Private Content Blocks
This feature allows site administrators to block parts of post/page/custom post type content using reusable shortcode.
- Reuse restricted content in multiple post/page/custom post types.
- Useful for managing private Promotions, Discount codes, Advertisements etc in multiple posts.
- Building private content shortcode without configuring the restrictions manually.
Practical Usage and Advantages
Free version of this plugin contains a shortcode called [[wppcp_private_content]]. You can use this shortcode to restrict content parts inside the post/page/custom post types without restricting the complete post/page/custom post type. However, this is only useful when you want to have different private content in different posts.
Assume you want to promote your premium membership plan and its only visible to registered members. You have to add following shortcode in each post to display the promotion only for members.
[[wppcp_private_content] Membership Plan Details[/wppcp_private_content]]
Consider following as the output of the above shortcode.
Monthly Membership
only £18 per month
- Great value
- Get all Brand courses
- Get all Brand interviews
- Get trained by business managers
- Download or watch online
- Get full money-back guarantee
Assume you decide to change the price of the membership. Now you have to go into each and every post and alter the shortcode to include the new pricing. This is really a waste of your valuable time editing all posts in site. Instead, private content blocks feature in Pro version allows you to add the private content in one place and use it in multiple post/page/custom post types. So when you want to change something, you have to only edit one place.
Also if you decide to change the Visibility levels, you have to change only one place instead of changing multiple shortcodes in multiple posts.
Usage Instructions
Once Pro version is installed, you will have a separate left menu item called Private Content Blocks. Click on Add New button of Private Content Blocks. You will get a screen similar to following.
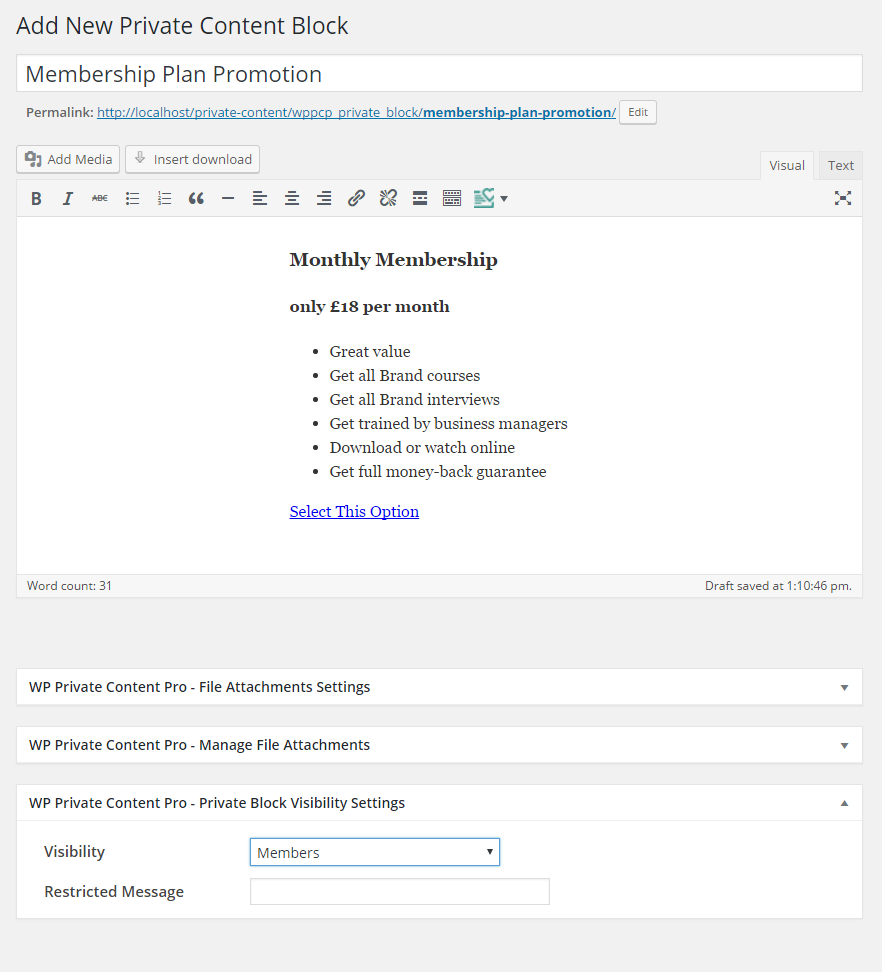
In this screen, title field is used to identify the private block. Then you can add the restricted content insider the text editor as shown. Then you need to select the Visibility. You have Members, Selected User Roles and Selected Capabilities as the available options.
Members – Restricts the content to guests and allows it for all members.
Selected User Roles – Restricts the content to guests and members who doesn’t have one of the selected user roles.
Selected Capabilities – Restricts the content to guests and members who doesn’t have one of the selected user capabilities.
Finally, you can add the message to be displayed for restricted users. Now click the Publish button to save the Private Content Block. Then select Private Content Blocks list from the left menu. You will get a screen similar to the following image.
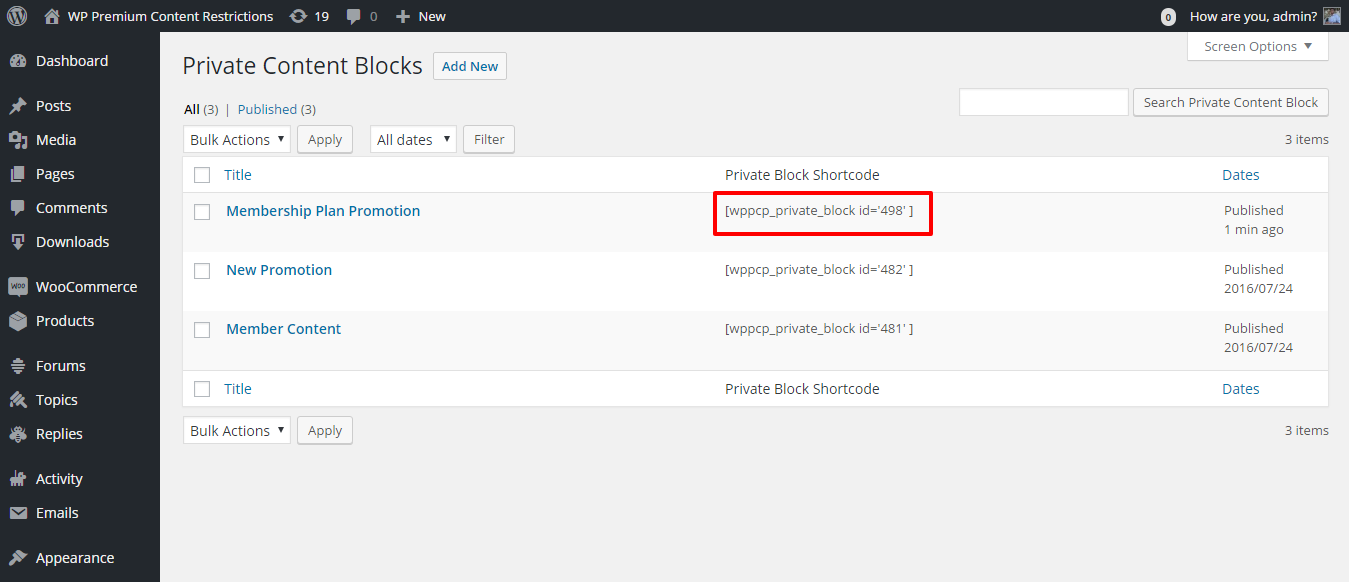
Now copy the shortcode and add it to any number of post/page/custom post types as you need. It will protect the restricted content inside all post/page/custom post types. If you want to make a change, you can come back to Private Content Blocks section and edit the block in just one place. Changes will be automatically reflected on all your pages with the shortcode.
This is also a great feature for building the shortcode through this interface instead of trying to manually add the restrictions into shortcode. More often users tend to use incorrect role/capability names when trying to configure manually.